
Step By Step Email Marketing |

|

|

|
|
Step By Step Email Marketing |
|
|

|
Step By Step Email Marketing |
|
|
|
|
Step By Step Email Marketing |
|
|
|
This guide will show you how to create a Marketing Campaign with the integrated 6 step process. You may go back and forth between the steps to make changes and updates at any point.
Step 1: Name your campaign
When adding a new campaign, you will be taken to the first step. Give your campaign an easily identifiable name as you may want to use this campaign again in the future. Once entered, select the blue arrow in the upper right to move to the next step.

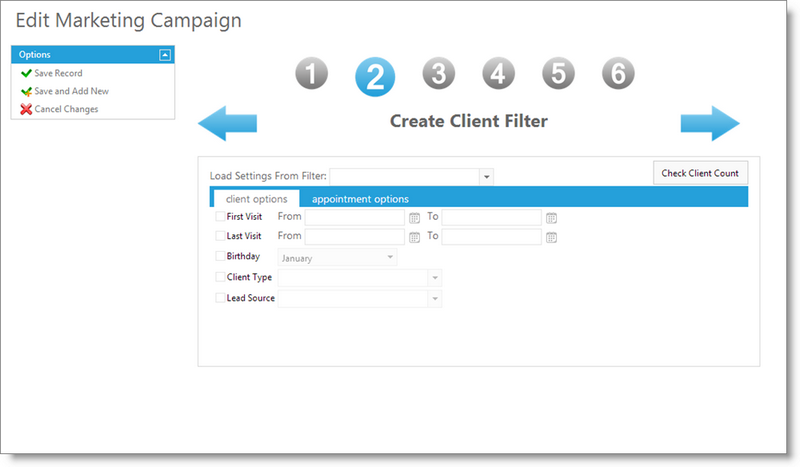
Step 2: Create a client filter
This is to identify which clients you wish to target for this campaign. You can create a filter in this step or select a filter previously made to be applied. The "Check Client Count" button will display the number of clients that meet your filter selections. If the fields are left blank, all clients with an email address will be targeted. Select the blue arrow in the upper right to move to the next step.
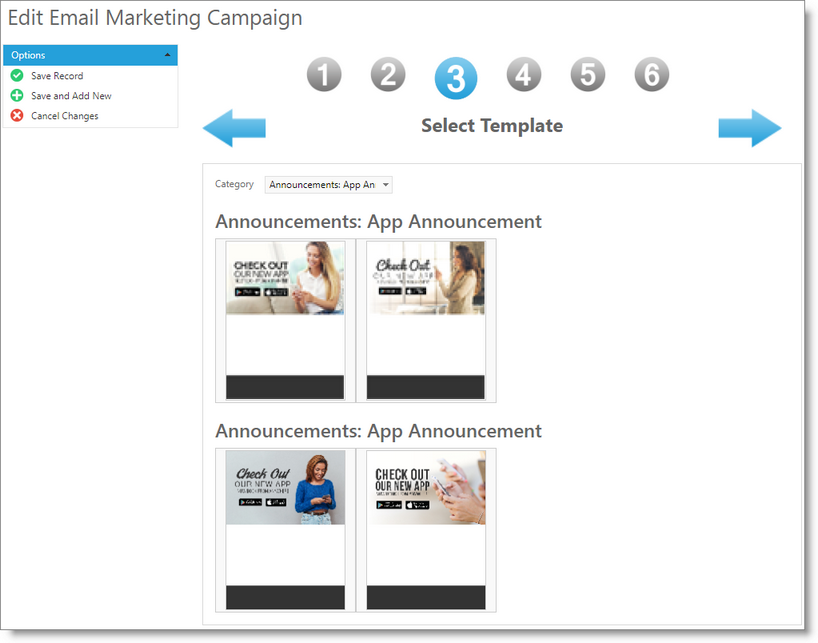
Step 3: Select a template
Choose the category of template you wish, and select a template from the previews that you wish to use. The layout headers and footers will match the image, but the words and formatting will be customizable. After choosing, click the blue arrow in the upper right to move to the next step.
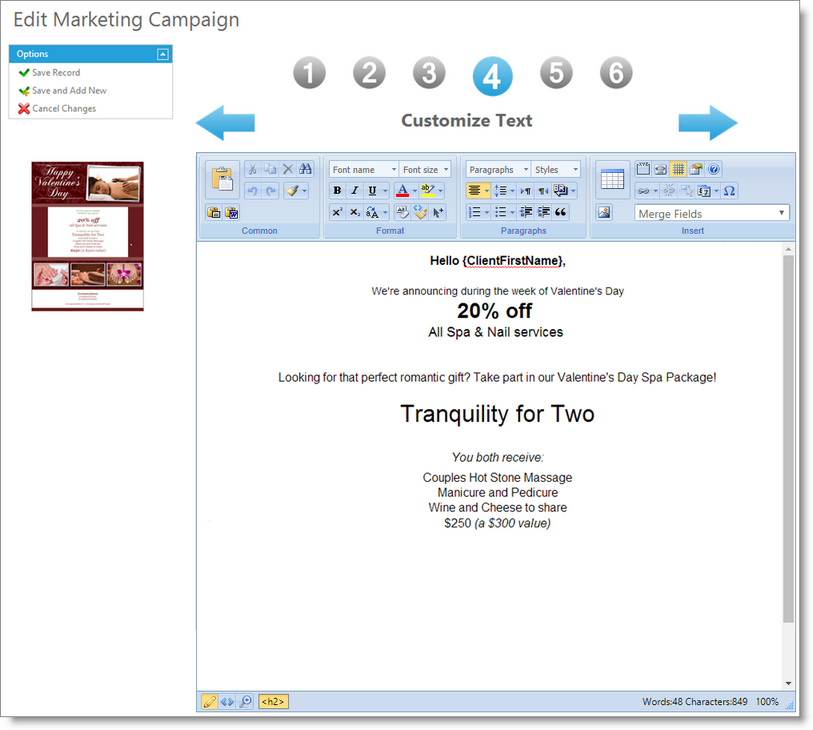
Step 4: Customize the template text
The text section is customizable. It will be displayed in the main body of the template. You can change the position, size, font, size, and color of the text. You can use Merge Fields from the available drop down to include fields that will insert client or business information when sent.
To insert an image into the template, please see the instructions on how to insert images.
Choose the blue arrow in the upper right to move to the next step.
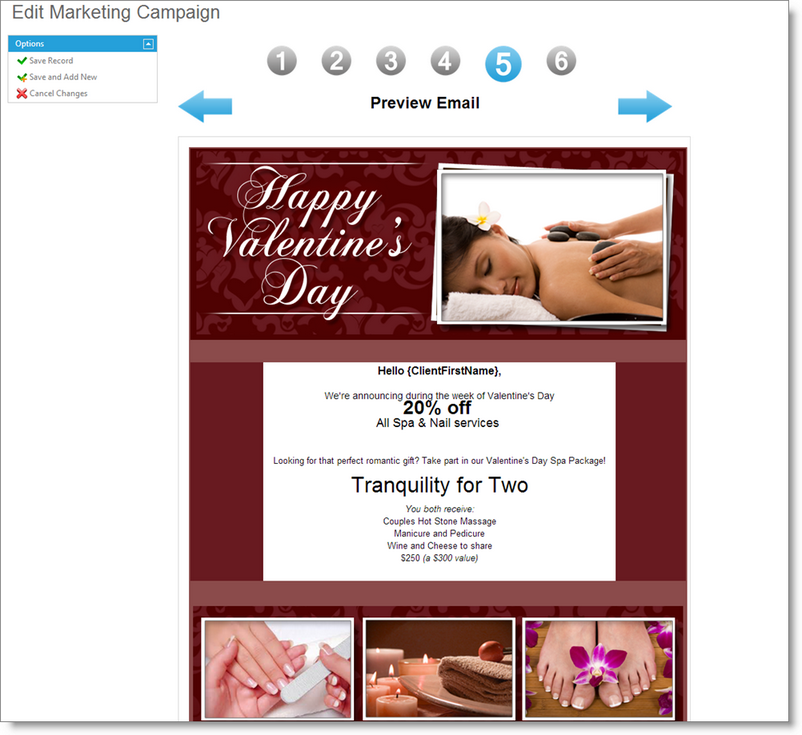
Step 5: Preview the email template
A preview of the text within the selected template will be displayed. Take time to check the text and placement. Use the blue arrow to the upper left to go back and make any changes. Use the blue arrow in the upper right to move to the next step.
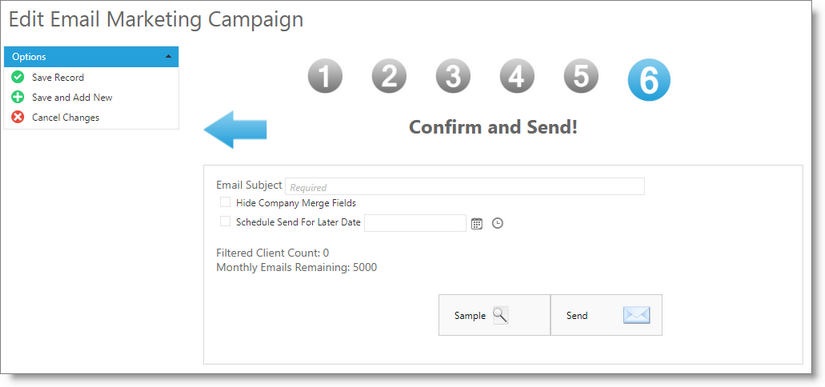
Step 6: Confirm and send your campaign
Enter an email subject line to be used for your campaign. The number of clients that will be emailed will be displayed. You can choose to send a preview email to an email address of your choice via the "Sample" button. You may also hide any merge fields that reference company information, which can be helpful for multi-location businesses.
Select the option to schedule a future date for this campaign to send, if you do not want it to be sent immediately.
The "Send" button will send your campaign to your clients.
This completes the creation and distribution of your marketing promotion.
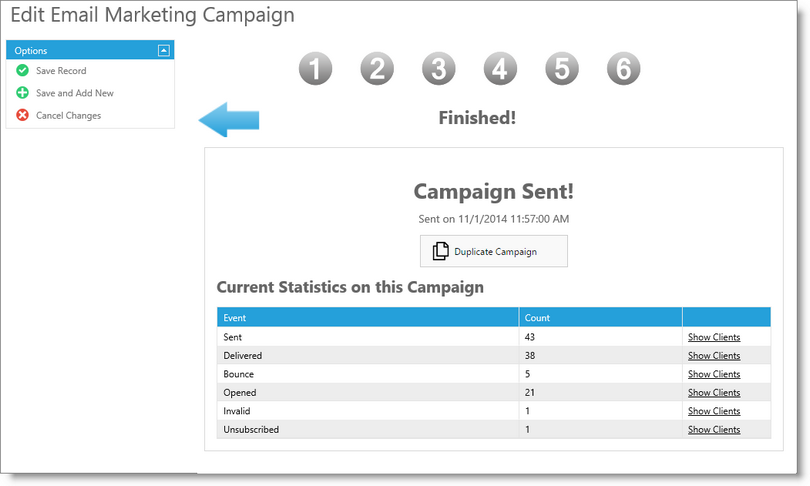
Once a campaign has been sent, you may view statistics about the campaign. The statistics are updated in real-time, so choosing to view these at a later time will show updated statistics.
After a campaign has been sent, it cannot be re-sent. You must create a new campaign to send another campaign, or you may duplicate an existing campaign by selecting the "Duplicate Campaign" button on this page.
