On Account Payments are available in the Ultimate edition of Envision Cloud. You can upgrade your account on the page.
|
The On Account feature allows for clients to have a balance on an account that they can make payments on, or keep a credit to use towards purchases. This feature may be disabled in the Company Settings.
Charging an Account
Charging to an account will show that the client has a balance that needs to be paid off. To charge to the client's account, follow the steps below:
| 1. | Open the Sales Register. |
| 2. | Select the client in the client drop down menu. |
| 3. | Ring up services or retail that are going to be paid off. |
This is an optional step, the benefit of doing this is to keep a record of exactly what the client is paying off. If this is not necessary for your records, you can skip this step.
|
| 2. | Select "OnAcct" as the payment method. |
| 3. | Enter the amount that will be charged to client's account in the payment amount field. |
| 4. | Click "Cash Out" to apply the charge. |
Pay on a Balance
| 1. | Open the Sales Register. |
| 2. | Search and select the client record. |
| 3. | Click "Add Money On Acct" in the Options menu to the left. |
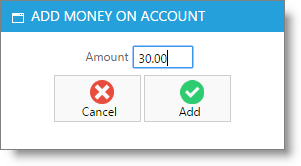
| 4. | Enter the payment amount. |
| 5. | Click OK. This will move you to the Take Payment screen. |
| 6. | Enter the method of payment. |
| 7. | Click "Cash Out". The amount will be applied, lowering or eliminating the balance due. |
Add a Credit
Follow these steps to add money to the client's account to be used later.
| 1. | Open the Sales Register. |
| 2. | Search and select the client record. |
| 3. | Click "Add Money On Acct" in the Options menu to the left. |
| 4. | Enter the payment amount. |
| 5. | Click OK. This will move you to the Take Payment screen. |
| 6. | Enter the method of payment. |
| 7. | Click "Cash Out". The amount will be applied to the client's account. |
Refund as a Credit
Use On Account to offer "store credit" when a client is returning products.
| 1. | Open the Sales Register. |
| 2. | Search and select the client record. |
| 3. | Ring up the services or retail the client is returning. |
| 4. | Edit each item in the Sales Register by selecting the pencil icon and select the "Return Item" option. The item will become a negative amount on the ticket. |
| 6. | Select "OnAcct" as the payment method. The amount will be added automatically in the payment field in the negative. |
| 7. | Click "Cash Out". The amount will be applied as a credit the client can use towards other purchases. |


