Take Payment |

|

|

|
|
Take Payment |
|
|

|
Take Payment |
|
|
|
|
Take Payment |
|
|
|
![]()

Take Payment Screen - Non-EMV Device
![]()

Take Payment Screen - EMV Device
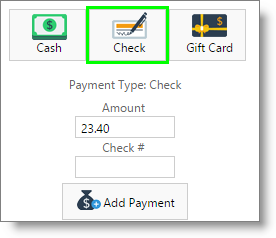
Payment Method Buttons
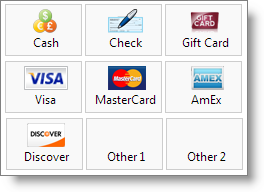
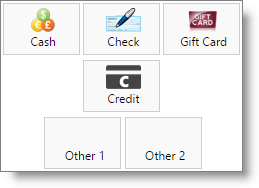
Click one of these buttons to select the method of payment. The screen will display differently depending upon which method you select. For example, if you select any Credit Card method you will be prompted to process the card (if you have integrated processing). If you select Gift Card, you'll be asked for the Gift Card number.
|
Selecting the payment type of Check or any of the Other payment types will enable a space to input information (like the check number) below the Amount on the payment screen. |
You can create and show up to 8 payment types named Other 1, Other 2, etc. These optional types can be named and enabled to show in the Company Settings.
Print Ticket
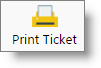
Click the "Print Ticket" button if you would like to print a "Pre-Receipt" for the transaction. This can be useful if the client is paying with a credit card and you do not feel comfortable asking them if they would like to put a tip on the card. Clicking the "Print Ticket" button will print a receipt with a tip line so that the client can write the tip amount on the receipt and you can enter this before processing their card. The credit card information and authorization number will not be printed on this receipt because the card has not been processed yet.
Add Payment
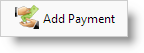
The program has the ability to split a payment between multiple methods. Select a payment method and enter the amount that the client will be paying with the first payment type then select "Add Payment". Repeat this process for any additional payment methods until the entire balance amount due is accounted for.
Total Due / Balance Due
This will display the total amount due for the sale. The balance will display the total that hasn't been accounted for with a payment. If the balance due displays a total in parentheses ( ) it means that there is change due back to the customer.
Payment List
The list of payments that have been collected to settle the balance due. Depending on the method of payment, additional notes can be entered next to the amount. The ![]() button will remove a method of payment from the list.
button will remove a method of payment from the list.
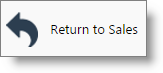
Return to Sales
|
Click this button if you need to make changes to the invoice before collecting payment. |
Cash out
|
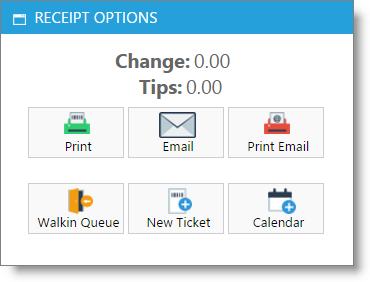
Click this button to complete the sales transaction and save the sale into your records. Once you click this button, you'll be prompted with the following screen displaying receipt and screen options.
|
|
The top row of buttons on this box refer to the receipt options. You may choose to print a receipt, email a copy of the receipt, or both print and email the receipt to the client.
The bottom row of buttons will return you to the screen you select. For example, clicking "Calendar" will return you to the appointment calendar screen. |