Schedule Sync allows users to share your calendar to other calendar programs such as (but not limited to) Google Calendar, iCalendar, Outlook, and the Calendar apps on iPhone / iPad. All the appointments made on the users calendar will be placed into the desired calendar program. When new appointments are created in Envision Cloud, they will also be synced to the calendar program automatically.
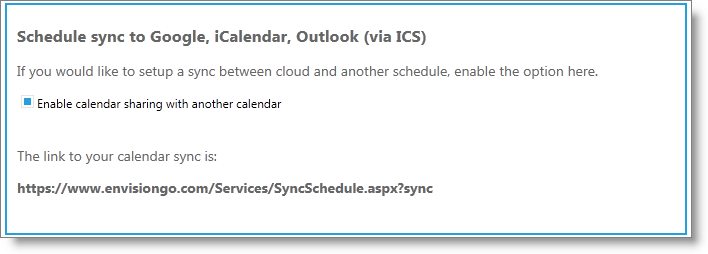
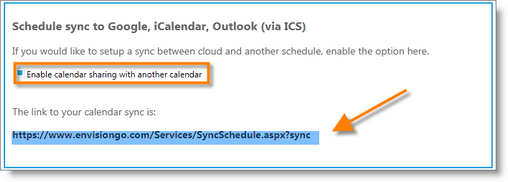
The first step to sync to any of the other calendar programs is to go the Employee List and select the desired user whose calendar you wish to sync. Edit to open the employee record and scroll to the bottom of the screen. Enable the option to share their calendar, highlight the entire URL displayed, then right-click and copy the URL.
Follow the steps below to sync your Envision Calendar with:
Google Calendar
| 1. | Click the DOWN arrow to the right of "Other Calendars". |
| 2. | Select from the drop down "Add by URL". |
| 3. | Right-click and PASTE the URL into the popup window that appears. |
iCalendar
| 1. | Click "File" in the menu bar. |
| 2. | Select "New Calendar Subscription" from the drop-down. |
| 3. | A pop-up window will appear. Right-click and PASTE the URL that you have copied. |
| 4. | Now click the "Subscribe" Button. You can now set the Name, Color, and refresh rate of the calendar. |
| 5. | Select the "OK" button once you are finished setting your options. |
Outlook
| 1. | In Outlook, select "Folder" from the menu bar. |
| 2. | Choose to "Open Calendar". |
| 3. | Select "From Internet" and a popup window will appear. |
| 4. | Right-click and PASTE the URL that you have copied. |
| 6. | You will be asked if you want to add the calendar and if you want to subscribe to updates, Select "Yes". |
iPhone /iPad
| 1. | Go to the SETTINGS App. |
| 2. | Select the "Mail, Contacts, Calendars" tab. |
| 3. | Tap the "Add Account" option near the top. |
| 4. | Choose the "Other" option. |
| 5. | Tap to "Add Subscribed Calendar". |
| 6. | Paste the URL into the field. |
| 8. | You can change the name of the calendar by entering it into the "Description" field. Tap SAVE. |


