Receive Inventory Transfer |

|

|

|
|
Receive Inventory Transfer |

|

|

|
The Receive Inventory Transfer screen allows multiple-location businesses to transfer inventory quickly and easily from one location to another. In the event that an inventory transfer is entered incorrectly, simply transfer the items back to the original location to correct.
Access the Receive Inventory Transfer Screen by hovering over Inventory on the menu bar, then choosing the Receive Inventory Transfer option.
![]()

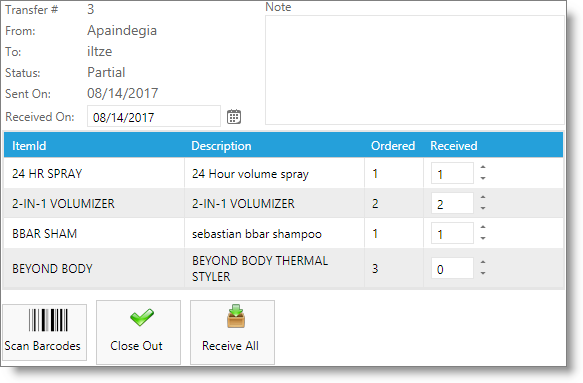
Transfer Number
The program will automatically assign a number for the transfer when it has been saved.
Transfer From
The location where the transfer is created will show here after saving the transfer. This field is not editable when receiving a transfer.
Transfer To
Select the end location of transferred items when creating a transfer. This field is not editable when receiving a transfer.
Status
If a transfer was created and not received, the transfer status will be "Open". If some of the items have been marked as received, the status will be "Partial". If the transfer was received in it's entirety, the status will be "Complete".
Sent On Date
The date entered when creating the transfer will show here. This field is not editable when receiving a transfer.
Received On Date
The date that a transfer was received will show here, once the transfer has been marked as received.
Product List
The items and quantities marked to transfer will show in this list.
Received Column
Enter the number of each transferred item that is being received.
Barcode Item Selection
Clicking the barcode button opens a pop-up window to allow quantity and barcode entry. Scan or type the barcode and select to Add Item.
Receive All
If you have received every item with the transfer, click this button. This will update the quantities in the item profiles and on this screen.